After the introduction to Frida in the first part of this post, we are now bringing Frida to use for solving a little crackme. After what we have already learned about Frida, this is going to be easy (- in theory). If you want to follow along, please download
Of course, I also assume that you have successfully installed Frida (version 9.1.16 or later) on your computer and started the corresponding server binary on the (rooted) device. I’m going to use an Android 7.1.1 ARM image in an emulator for this tutorial.
Install the Uncrackable Crackme Level 1 app on your device:
adb install sg.vantagepoint.uncrackable1.apk
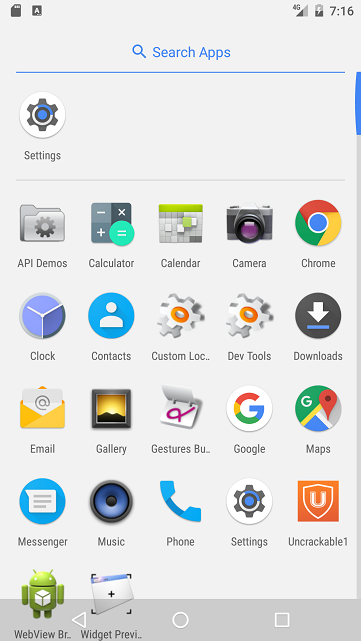
Wait until it is installed, then start it from the menu on the emulator (orange icon in bottom right corner):
Once you start the app you will notice that it doesn’t want to run on a rooted device:
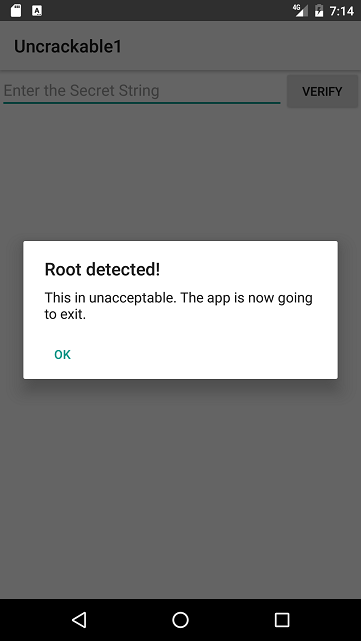
If you press “OK”, the app exists immediately. Hm. Not so nice. Seems we cannot solve the crackme this way. Really? Let’s see what is going on and take a look at the internals of the app.
Convert the apk to a jar with dex2jar:
michael@sixtyseven:/opt/dex2jar/dex2jar-2.0$ ./d2j-dex2jar.sh -o /home/michael/UnCrackable-Level1.jar /home/michael/UnCrackable-Level1.apk

dex2jar /home/michael/UnCrackable-Level1.apk -> /home/michael/UnCrackable-Level1.jar
And load it into BytecodeViewer (or another disassembler of your choice that supports Java). You might also try to load the APK directly into BytecodeViewer or just extract the classes.dex, but that didn’t work for me, so I converted it with dex2jar before.
In BytecodeViewer, chose View->Pane1->CFR->Java to use the CFR Decompiler. You can set Pane2 to Smali code if you like to compare the results of the decompiler to the Smali disassembly (which is usually a little more accurate than the decompilation).
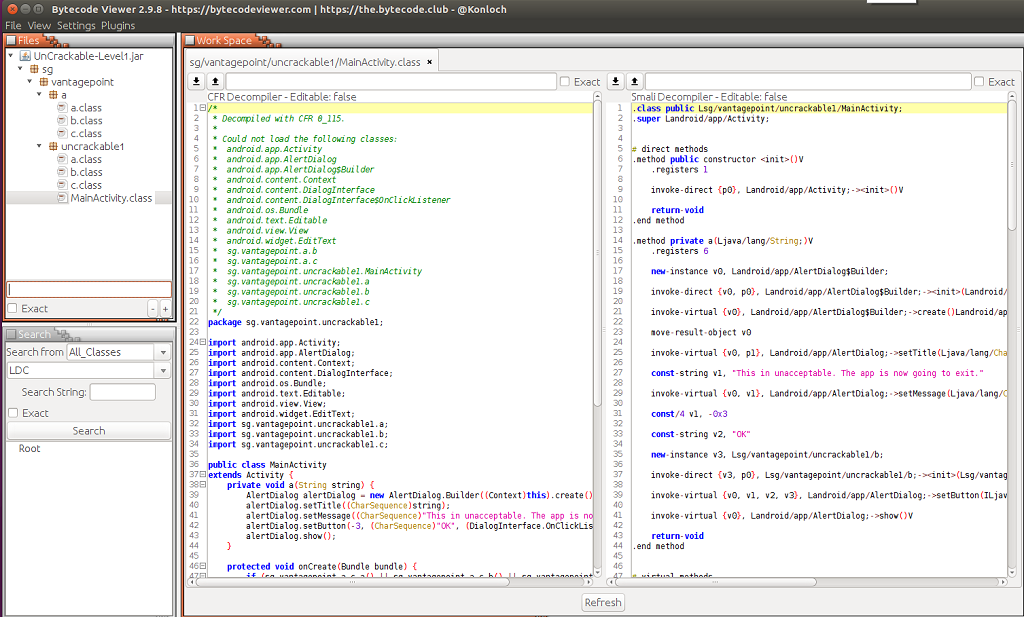
Here is the output of the CFR Decompiler for the app’s MainActivity:
package sg.vantagepoint.uncrackable1;

import android.app.Activity;
import android.app.AlertDialog;
import android.content.Context;
import android.content.DialogInterface;
import android.os.Bundle;
import android.text.Editable;
import android.view.View;
import android.widget.EditText;
import sg.vantagepoint.uncrackable1.a;
import sg.vantagepoint.uncrackable1.b;
import sg.vantagepoint.uncrackable1.c;

public class MainActivity
extends Activity {
    private void a(String string) {
        AlertDialog alertDialog = new AlertDialog.Builder((Context)this).create();
        alertDialog.setTitle((CharSequence)string);
        alertDialog.setMessage((CharSequence)"This in unacceptable. The app is now going to exit.");
        alertDialog.setButton(-3, (CharSequence)"OK", (DialogInterface.OnClickListener)new b(this));
        alertDialog.show();
    }

    protected void onCreate(Bundle bundle) {
        if (sg.vantagepoint.a.c.a() || sg.vantagepoint.a.c.b() || sg.vantagepoint.a.c.c()) {
            this.a("Root detected!"); //This is the message we are looking for
        }
        if (sg.vantagepoint.a.b.a((Context)this.getApplicationContext())) {
            this.a("App is debuggable!");
        }
        super.onCreate(bundle);
        this.setContentView(2130903040);
    }

    public void verify(View object) {
        object = ((EditText)this.findViewById(2131230720)).getText().toString();
        AlertDialog alertDialog = new AlertDialog.Builder((Context)this).create();
        if (a.a((String)object)) {
            alertDialog.setTitle((CharSequence)"Success!");
            alertDialog.setMessage((CharSequence)"This is the correct secret.");
        } else {
            alertDialog.setTitle((CharSequence)"Nope...");
            alertDialog.setMessage((CharSequence)"That's not it. Try again.");
        }
        alertDialog.setButton(-3, (CharSequence)"OK", (DialogInterface.OnClickListener)new c(this));
        alertDialog.show();
    }
}
Looking at the other decompiled class files, we see that it is a small app and we could probably also solve the crackme by reverse engineering the decryption and string modification routines. However, since we know Frida, we have some more convenient possibilities. Let’s look where the app checks if the device is rooted. Right above the “Root detected” message, we see:
if (sg.vantagepoint.a.c.a() || sg.vantagepoint.a.c.b() || sg.vantagepoint.a.c.c())
If you have a look at the sg.vantagepoint.a.c class you see the various checks for root:
public static boolean a()
    {
        String[] a = System.getenv("PATH").split(":");
        int i = a.length;
        int i0 = 0;
        while(true)
        {
            boolean b = false;
            if (i0 >= i)
            {
                b = false;
            }
            else
            {
                if (!new java.io.File(a[i0], "su").exists())
                {
                    i0 = i0 + 1;
                    continue;
                }
                b = true;
            }
            return b;
        }
    }

    public static boolean b()
    {
        String s = android.os.Build.TAGS;
        if (s != null && s.contains((CharSequence)(Object)"test-keys"))
        {
            return true;
        }
        return false;
    }

    public static boolean c()
    {
        String[] a = new String[7];
        a[0] = "/system/app/Superuser.apk";
        a[1] = "/system/xbin/daemonsu";
        a[2] = "/system/etc/init.d/99SuperSUDaemon";
        a[3] = "/system/bin/.ext/.su";
        a[4] = "/system/etc/.has_su_daemon";
        a[5] = "/system/etc/.installed_su_daemon";
        a[6] = "/dev/com.koushikdutta.superuser.daemon/";
        int i = a.length;
        int i0 = 0;
        while(i0 < i)
        {
            if (new java.io.File(a[i0]).exists())
            {
                return true;
            }
            i0 = i0 + 1;
        }
        return false;
    }
Using Frida, we could make all of these methods return false by overwriting them as we have seen in part I of this tutorial. But what actually happens when one of the function return true because it discovers root? As we have seen in MainActivityfunction a it opens a dialog. It also sets an onClickListener that gets triggered when we press the OK button:
alertDialog.setButton(-3, (CharSequence)"OK", (DialogInterface.OnClickListener)new b(this));
This onClickListener implementation doesn’t do much:
package sg.vantagepoint.uncrackable1;

class b implements android.content.DialogInterface$OnClickListener {
    final sg.vantagepoint.uncrackable1.MainActivity a;

    b(sg.vantagepoint.uncrackable1.MainActivity a0)
    {
        this.a = a0;
        super();
    }

    public void onClick(android.content.DialogInterface a0, int i)
    {
        System.exit(0);
    }
}
It just exits the app with System.exit(0). So all we have to do is to prevent the app from exiting. Let’s overwrite the onClick method with Frida. Create a file uncrackable1.js and put your code inside:
setImmediate(function() { //prevent timeout
    console.log("[*] Starting script");

    Java.perform(function() {

      bClass = Java.use("sg.vantagepoint.uncrackable1.b");
      bClass.onClick.implementation = function(v) {
         console.log("[*] onClick called");
      }
      console.log("[*] onClick handler modified")

    })
})
If you have read part I of this tutorial, the script should be quite self explanatory: We wrap our Code in a setImmediate function to prevent timeouts (you may or may not need this), then call Java.perform to make use of Frida’s methods for dealing with Java. Then the actual magic follows: We retreive a wrapper for the class the implements the OnClickListener interface and overwrite its onClick method. In our version, this function just writes some console output. Unlike the original, it does not exit the app. Since the original onClickHandler is replaced by our Frida injected function and never gets called, the app should not exit anymore when we click the OK button of the dialog. Let’s try it. Open the app (let it display the “Root detected” dialog)
.png)
and inject the script:
frida -U -l uncrackable1.js sg.vantagepoint.uncrackable1
Give Frida a few seconds to inject its code until you see the “onClick handler modified” message (you might get a shell before since we put our code in an setImmediate wrapper so Frida executes it in the background).
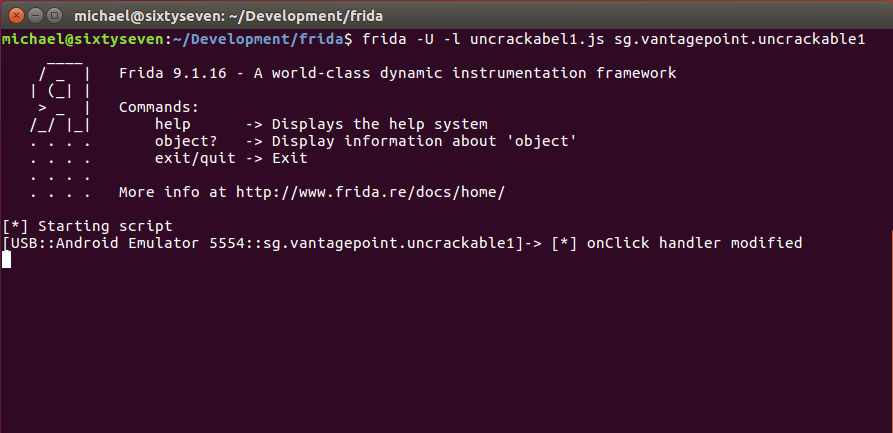
Then click on the OK button in the app. If everything went well, the app does not exit anymore.
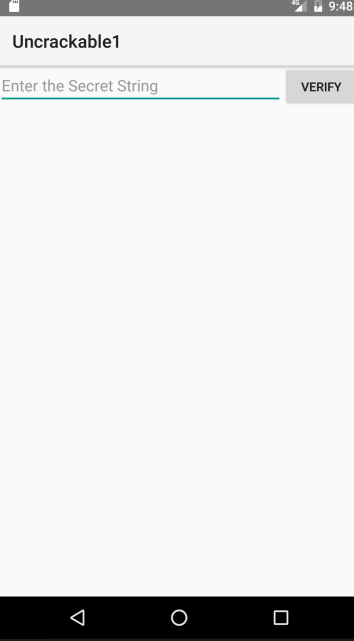
Great: The dialog vanishes and we can enter a password. Let’s enter something, press Verify and see what happens:
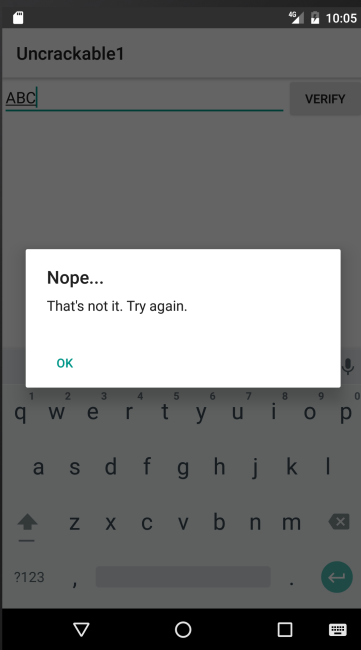
Wrong code, as was to be expected. But we have an idea what we are looking for: Some kind of encryption / decryption routines and a comparison of result and input.
Checking MainActivity again, we see in the function
public void verify(View object) {
that it calls method a from class sg.vantagepoint.uncrackable1.a:
if (a.a((String)object)) {
This is the decompilation of the sg.vantagepoint.uncrackable1.a class:
package sg.vantagepoint.uncrackable1;

import android.util.Base64;
import android.util.Log;

/*
 * Exception performing whole class analysis ignored.
 */
public class a {
    public static boolean a(String string) {
        byte[] arrby = Base64.decode((String)"5UJiFctbmgbDoLXmpL12mkno8HT4Lv8dlat8FxR2GOc=", (int)0);
        byte[] arrby2 = new byte[]{};
        try {
            arrby2 = arrby = sg.vantagepoint.a.a.a((byte[])a.b((String)"8d127684cbc37c17616d806cf50473cc"), (byte[])arrby);
        }
        catch (Exception var2_2) {
            Log.d((String)"CodeCheck", (String)("AES error:" + var2_2.getMessage()));
        }
        if (!string.equals(new String(arrby2))) return false;
        return true;
    }

    public static byte[] b(String string) {
        int n = string.length();
        byte[] arrby = new byte[n / 2];
        int n2 = 0;
        while (n2 < n) {
            arrby[n2 / 2] = (byte)((Character.digit(string.charAt(n2), 16) << 4) + Character.digit(string.charAt(n2 + 1), 16));
            n2 += 2;
        }
        return arrby;
    }
}
Notice the string.equals comparison at the end of the a method and the creation of the string arrby2 in the try block above. arrby2 is the return value of the function sg.vantagepoint.a.a.a. The string.equals comparison compares our input to arrby2. So what we are after is the return value of sg.vantagepoint.a.a.a.
We could now start to reverse engineer the string manipulation and decryption functions and work on the original encrypted strings, that are also contained in the code above. Or we let the app do all its maniplation and encryption that we really don’t care for and just hook the sg.vantagepoint.a.a.a function to catch its return value. The return value is the decrypted string (in form of a byte array) that our input gets compared to. This is what the following script does:
        aaClass = Java.use("sg.vantagepoint.a.a");
        aaClass.a.implementation = function(arg1, arg2) {
            retval = this.a(arg1, arg2);
            password = ''
            for(i = 0; i < retval.length; i++) {
               password += String.fromCharCode(retval[i]);
            }

            console.log("[*] Decrypted: " + password);
            return retval;
        }
        console.log("[*] sg.vantagepoint.a.a.a modified");
We overwrite the sg.vantagepoint.a.a.a function, catch its return value and convert it into a readable string. This is the decrypted string we are looking for, so we print it out to the console and hopefully get our solution.
Putting the pieces together, here is the complete script:
setImmediate(function() {
    console.log("[*] Starting script");

    Java.perform(function() {

        bClass = Java.use("sg.vantagepoint.uncrackable1.b");
        bClass.onClick.implementation = function(v) {
         console.log("[*] onClick called.");
        }
        console.log("[*] onClick handler modified")


        aaClass = Java.use("sg.vantagepoint.a.a");
        aaClass.a.implementation = function(arg1, arg2) {
            retval = this.a(arg1, arg2);
            password = ''
            for(i = 0; i < retval.length; i++) {
               password += String.fromCharCode(retval[i]);
            }

            console.log("[*] Decrypted: " + password);
            return retval;
        }
        console.log("[*] sg.vantagepoint.a.a.a modified");


    });

});
Let’s run this script. As before, save it as uncrackable1.js and do (if Frida doesn’t rerun it automatically)
frida -U -l uncrackable1.js sg.vantagepoint.uncrackable1
Wait until you see the message sg.vantagepoint.a.a.a modified, then click OK in the Root detected dialog, enter something in the secret code field and press Verify. Still no luck in the emulator.
But notice the Frida output:
michael@sixtyseven:~/Development/frida$ frida -U -l uncrackable1.js sg.vantagepoint.uncrackable1
     ____
    / _  |   Frida 9.1.16 - A world-class dynamic instrumentation framework
   | (_| |
    > _  |   Commands:
   /_/ |_|       help      -> Displays the help system
   . . . .       object?   -> Display information about 'object'
   . . . .       exit/quit -> Exit
   . . . .
   . . . .   More info at http://www.frida.re/docs/home/

[*] Starting script
[USB::Android Emulator 5554::sg.vantagepoint.uncrackable1]-> [*] onClick handler modified
[*] sg.vantagepoint.a.a.a modified
[*] onClick called.
[*] Decrypted: I want to believe
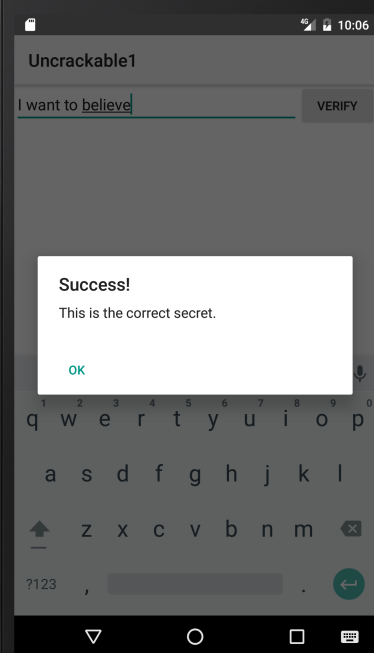
Nice. We actually got the decrypted string: I want to believe. That’s it. Let’s check if it works:
By now, I hope you are at least a little impressed by what you can do with Frida and it’s dynamic binary instrumentation capabilities.
As always, for comments, critique etc. contact me on Twitter.
